
(→Vizjun) |
|||
| Line 285: | Line 285: | ||
=== Summoning Uberquests === |
=== Summoning Uberquests === |
||
| + | ====The Butcher==== |
||
| − | '''Act 1''' |
||
| + | |||
| − | '''Act 2''' |
||
| + | '''Summon at:''' The Hole Level 2 (Black Marsh) |
||
| − | '''Act 3''' |
||
| + | |||
| − | '''Act 5''' |
||
| + | Returning from his hellhole beneath Tristram, the Butcher is back and out for new blood. He is slow and easy to avoid, but hits hard and fast and if he catches you, you are dead meat. |
||
| + | |||
| + | '''Strategy:''' The Butcher is slow, but hits very hard and has a high attack rating. The basic strategy is simple - do not get hit. Luckily, the Butcher's room is fairly large, making it relatively easy to avoid his cleaver. Bring a ranged attack if you have one. |
||
| + | |||
| + | '''Loot:''' The Butcher drops decent items on all difficulty levels. Defeat the Butcher on Destruction difficulty to get The Butcher's Tooth. |
||
| + | |||
| + | The Butcher's Tooth |
||
| + | Keep in Inventory to gain Bonus |
||
| + | Required Level: 20 |
||
| + | 50% Chance of Open Wounds |
||
| + | 100% Extra Gold from Monsters |
||
| + | 40% Better Chance of Getting Magic Items |
||
| + | |||
=== Uberlevels === |
=== Uberlevels === |
||
'''Act 1''' |
'''Act 1''' |
||
Revision as of 03:35, 24 June 2010
Uberquests
Dungeon Uberquests
You can find these uberbosses in their own special areas. It is usually not a good idea to go there before you are at least of equal level as the monsters that inhabit the area, or you will die.
Warning: Do not jump in at level 15 just because you found the entrance.
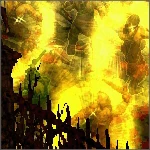
Creature of Flame
Difficulty: Easy
| Horazon's Focus |
| Level Requirement: 40 Keep in Inventory to gain Bonus |
Location: Ancient Tunnels (Lost City)
This is a forbidden place. Return whence you came and your life will be spared
This first uberquest reenacts a removed quest from Diablo 1. Horazon (also known as the real Summoner) summoned a powerful demonlord that turned out to be too strong for him. He managed to trap it in his arcane sanctuary, but could not defeat it and it almost killed him. Neither Horazon nor the demon wants you to be there, so do not expect a warm welcome by either side...
Strategy: No rocket science, just kill the two bosses. Like all uberquests, do not attempt it as soon as you find the entrance. The bosses are level 55 and will destroy any lower level character with ease.
Tip: You may want to maximize your fire and lightning resistance. Both bosses have Forked Lightning, which does massive amounts of damage at close range.
Loot: Horazon's Familiar and Creature of Flame drop decent items on all difficulty levels. Defeat Creature of Flame on Destruction difficulty to get Horazon's Focus.
Infernal Machine
Difficulty: Moderate
| Optical Detector |
| Level Requirement: 60 Keep in Inventory to gain Bonus |
Location: The Pit Level 2 (Tamoe Highland)
The next uber quest involves defeating a special siege tower located in a small underground cave. The tower summons random elite monsters at a rapid rate. Move quickly, because time is against you.
Strategy: Rush the boss, otherwise it keeps spawning more and more monsters, making it harder and harder to reach and destroy it. On the other hand, if you need to level up, the constant flood of monsters is a great source of experience as well.
Loot: Infernal Machine drops decent items on all difficulty levels. Defeat Infernal Machine on Destruction difficulty to get the Optical Detector.
Death Projector
Difficulty: Tricky
| Laser Focus Crystal |
| Level Requirement: 80 Keep in Inventory to gain Bonus |
Location: Swampy Pit Level 3 (Flayer Jungle)
The Swampy Pit serves as testing grounds for Mephisto's latest siege weapon. The Death Projector slowly rotates, firing a fearsome energy beam in a full circle, annihilating anything in its path.
The weapon is guarded by eight ghostly Mechanics. It is said that they abduct people from the tribes around Kurast to sacrifice them, powering the Death Projector’s energy array with their still beating hearts. The Mechanics are immune to any attack and if they kill a player or minion in the central circle, the Death Projector is restored to its original condition.
Strategy: This may be your first experience with immunity shields. To get rid of the Death Projector's immunities, keep at least one Mechanic nearby.
However, there is no way to harm any of the Mechanics. Try your best to avoid their attacks.
The death laser is not too hard to avoid, but you should really try to do so because if it hits you, you're finished. Beware the splash damage when it hits a wall.
Loot: Death Projector drops decent items on all difficulty levels. Defeat the Death Projector on Destruction difficulty to get the Laser Focus Crystal.
Azmodan
Difficulty: Hard
| Azmodan's Heart |
| Level Requirement: 100 Keep in Inventory to gain Bonus |
Location: Forgotten Reliquary (Upper Kurast)
The Lord of Sin walks the earth. Azmodan hits hard and emits a shield aura that grants unholy invulnerability to nearby demons. The tight confines of the temple area make it hard to get past the immortal monsters blocking your way and reach Azmodan himself. Azmodan also feasts on death, healing himself when he makes a kill.
Strategy: Try to separate Azmodan from his minions. Lure Azmodan to one side of the level and his demons to the other, then quickly run over and attack Azmodan himself.
Azmodan has a dangerous melee attack which creates a pentagram of burning hellfire. You may want to load up on fire resistance for this fight.
Azmodan does not heal if one of the regular monsters kills you. If you are a necromancer, you can disable his healing with your Void Archon’s warp field aura.
Loot: Azmodan drops good items on all difficulty levels. Defeat Azmodan on Destruction difficulty to get the Azmodan's Heart.
Azmodan also has 2% chance to drop a trophy on Destruction difficulty. Cube the trophy with the charm for a small bonus.
Rathma Square
Difficulty: Very Hard
| Spirit Trance Herb |
| Level Requirement: 100 Keep in Inventory to gain Bonus |
Location: Ruined Fane (Kurast Causeway)
My blade sings for mortal blood, and by my dark masters, it shall not be denied!
Back in the days when Kurast was the center of civilization and black magic was not yet frowned upon, this was where the priests of Rathma - the necromancers - practiced their art. The place was abandoned when the religion of Zakarum took over the city and banned pagan magic, making it the perfect hiding place for an ancient evil bent on taking out the Church from within.
Primus, son of Mephisto, was the leader of the Cult of the Triune in ages past before it was destroyed and he nearly lost his life. His efforts to rebuild the Triune have been hampered by the crusaders of Zakarum, but he remains a formidable foe, doubly so in the home city of the Zakarum.
Strategy: Primus himself is not particularly hard, despite his powerful ranged Bladestorm attack. The blades track your position, but do less damage than his normal attack and can be avoided, blocked and dodged.
Primus has a powerful ranged Bladestorm attack that tears minions to pieces and inflicts an unholy curse that drains your life away. The curse cannot be negated or resisted in any way.
Primus is guarded by an army of Gore Crawlers, which after several millennia in and around Rathma Square can raise themselves from the dead. Shattering the corpse does not make any difference, but the resurrections takes 10 seconds, during which you can attempt to run away and ditch them.
Loot: Primus drops good items on all difficulty levels. On Destruction difficulty, Primus has 1/6 chance to drop the Spirit Trance Herb.
Primus also has 2% chance to drop a trophy on Destruction difficulty. Cube the trophy with the charm for a small bonus.
Cathedral of Vanity
Difficulty: Extreme
| Idol of Vanity |
| Level Requirement: 100 Keep in Inventory to gain Bonus |

Location: Underground Passage Level 2
How much suffering, mortal, does it take before you lose your grace?
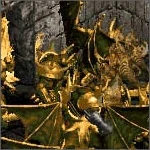
According to pagan myth, the mortal plane – Sanctuary – was created by the fallen angel Inarius and the demon Lilith to serve as a refuge from the Eternal War. The two created a race of servants from the earth which were to worship them for all eternity.
Humanity broke free when a small group of farmers rediscovered their birthright and ancient powers inherited from their supernatural parents. As the edyrem army grew, Inarius descended into megalomanic madness and was eventually destroyed along with his golden cathedral of vanity.
It is whispered that the ghosts of Inarius and his closest worshippers still roam the cathedral…
Strategy: The Crystal Ball is the last of the cathedral’s magical defences. The tower grants a holy invulnerability shield to nearby worshippers and casts a searing beam of Heavenly light that destroys anything it touches. Destroy the Crystal Ball to dispel the immortality from the other enemies.
Loot: Inarius and his High Clerics drop good items on all difficulty levels. Defeat Inarius on Destruction difficulty to get the Idol of Vanity.
Inarius also has 2% chance to drop a trophy on Destruction difficulty. Cube the trophy with the charm for a small bonus.
Sacred sets and uniques can drop here on Destruction difficulty.
Bonus quest Inarius' cathedral of vanity was ultimately destroyed by Mephisto, and Inarius and his followers were captured, mutilated and deformed to grotesque Overlords to serve the forces of Hell. One may be able to summon the tormented ghost of Inarius, defeat him and steal his power...
Toraja
Difficulty: Impossible
Location: Abaddon (Frigid Highlands)
Now nothing more than overgrown ruins, Toraja once stood proud as a medium-sized city in ancient times, and has become legendary as the city where the nephalem Uldyssian recruited most of his edyrem to spearhead the uprising against the infernal Cult of the Triune and Inarius’ Cathedral of Light.
This is where the time portal leads you. Aid the edyrem in their battle against Lilith and the Triune’s minions.
Strategy: The enemies on this level, Celebrant archers and Morlu fighters, are completely invulnerable and there is nothing you can do about it. However, if you complete the Judgement Day summoning uberquest, you receive a charm that grants you the ability to summon edyrem.
The edyrem are fighter-mages who have the ability to dispel the immortality wards off the enemies. Although they are vulnerable to the supernatural onslaught of the Triune, they have the power to cast an invulnerability shield of their own, allowing them to close in and remove the immunities.
| Sha'ad Rune Number 6 of 6 |
Weapons: +30% Enhanced Damage Armor: +30% Enhanced Defense Shields: +30% Enhanced Defense Level Requirement: 100 |
| Auhe Rune Number 5 of 6 |
Weapons: Regenerate Mana +15% Armor: Regenerate Mana +5% Shields: Regenerate Mana +5% Level Requirement: 100 |
| Krys Rune Number 4 of 6 |
Weapons: Target Takes Additional Damage of 100 Armor: Target Takes Additional Damage of 25 Shields: Target Takes Additional Damage of 25 Level Requirement: 100 |
Loot: Lilith drops good items on all difficulty levels. On Destruction difficulty, when you kill Lilith, you have 30 seconds to cube the Crystalline Flame Medaillon you used to summon the edyrem with an Arcane Crystal.
Crystalline Flame Medaillon + Arcane Crystal -> returns Crystalline Flame Medaillon w/ added bonuses
This upgrade recipe adds the following bonuses:
Maximum Skill Level Increased by 1 All Resists +10% Regenerate Life +100
Toraja on Destruction difficulty is the only place in the game where you can find the following three Great Runes. These runes are required for the most powerful runewords.
Sacred sets and uniques can drop here on Destruction difficulty.
Vizjun
Difficulty: Impossible
| Cold Fusion Schematics |
| Level Requirement: 100 Keep in Inventory to gain Bonus |

Location: Disused Fane (Kurast Bazaar)
Vizjun, the technological home city of the Viz-Jaq'Taar or Assassins, has recently run into a major system flaw. The artificial intelligence, Master Control System seems to have developed sentience as Diablo approached; the computer then constructed a large army of robots to take over the city, its missile silos and from there the world.
The MCS managed to turn the city's cybernetic defences against its inhabitants. Those seeking to retake the compound will have to contend with its arsenal of combat drones, minefields and electro-pulse generators. It is said that the MCS slumbered and fulfilled its menial tasks for years until the Viz-Jaq'Taari scientists had developed 'The Bomb', a secret weapon capable of destroying entire nations...
Strategy: Basic strategy is not too difficult: there are melee robots, laser robots and machine-bolter robots. You should know what to do by now.
But beware, Big Brother is watching you. The area's automatic defences will periodically deploy additional drones, chaingun sentries, minefields and various explosives when you enter the protected zone. The computer voice warns you of what is about to happen.
The level boss, MCS is invulnerable to any damage. To destroy it, use the handy Purify skill you acquired in Duncraig. A few shots should be enough.
Loot: MCS drops good items on all difficulty levels. Defeat MCS on Destruction difficulty to get the Cold Fusion Schematics.
MCS also has 2% chance to drop a trophy on Destruction difficulty. Cube the trophy with the charm for a small bonus.
Sacred sets and uniques can drop here on Destruction difficulty.
Summoning Uberquests
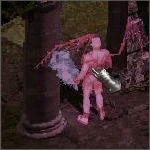
The Butcher
Summon at: The Hole Level 2 (Black Marsh)
Returning from his hellhole beneath Tristram, the Butcher is back and out for new blood. He is slow and easy to avoid, but hits hard and fast and if he catches you, you are dead meat.
Strategy: The Butcher is slow, but hits very hard and has a high attack rating. The basic strategy is simple - do not get hit. Luckily, the Butcher's room is fairly large, making it relatively easy to avoid his cleaver. Bring a ranged attack if you have one.
Loot: The Butcher drops decent items on all difficulty levels. Defeat the Butcher on Destruction difficulty to get The Butcher's Tooth.
The Butcher's Tooth Keep in Inventory to gain Bonus Required Level: 20 50% Chance of Open Wounds 100% Extra Gold from Monsters 40% Better Chance of Getting Magic Items
Uberlevels
Act 1 Act 2 Act 3 Act 5
Heroics
Act 1 Act 2 Act 3 Act 5