
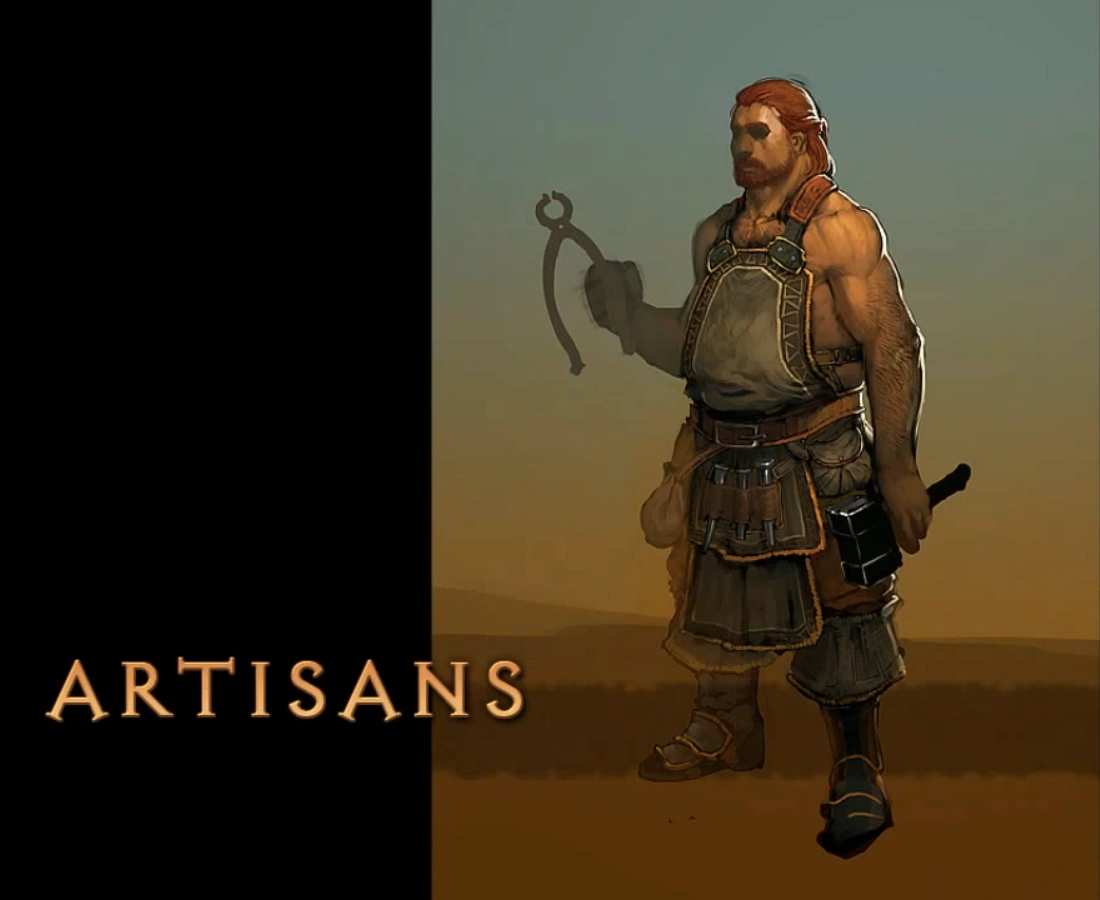
Artisans are a new type of NPC that will appear in Diablo III. Players will be introduced to these NPCs as they progress through the main quest line of the game. The player will be able to obtain Artisans by completing quests for them and earning their trust. Once an Artisan has joined the player, they will make camp at the nearest town, and will follow the player throughout the various acts. There are three different Artisans that the player will encounter throughout their journey: The Blacksmith, The Mystic, and The Jeweler. The three Artisans will offer you various services as well as gossip and dialogue. All Artisans have the ability to craft items, and act as vendors who buy and sell items to the player as well. Each Artisan possesses different specialties, and the services that each offers are defined by those individual talents.
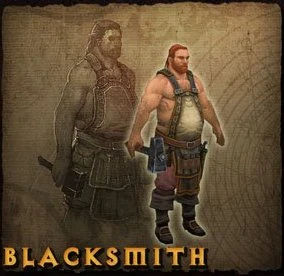

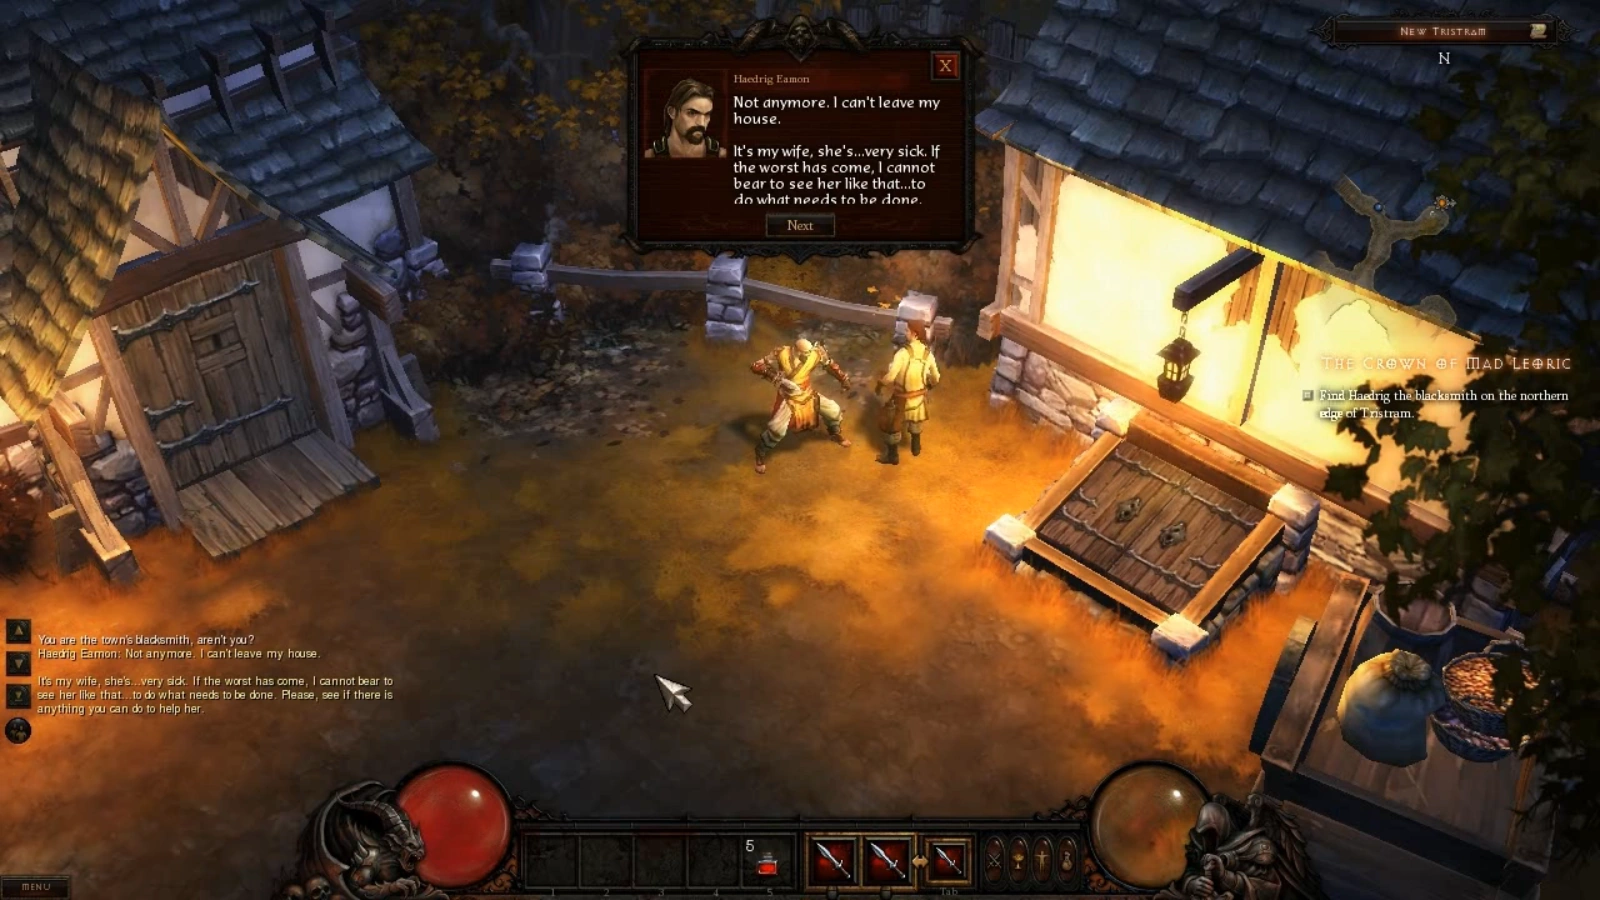
The Blacksmith Haedrig Eamon
- This article is about the blacksmithing artisan. Were you looking for information about the blacksmith NPC Haedrig Eamon?
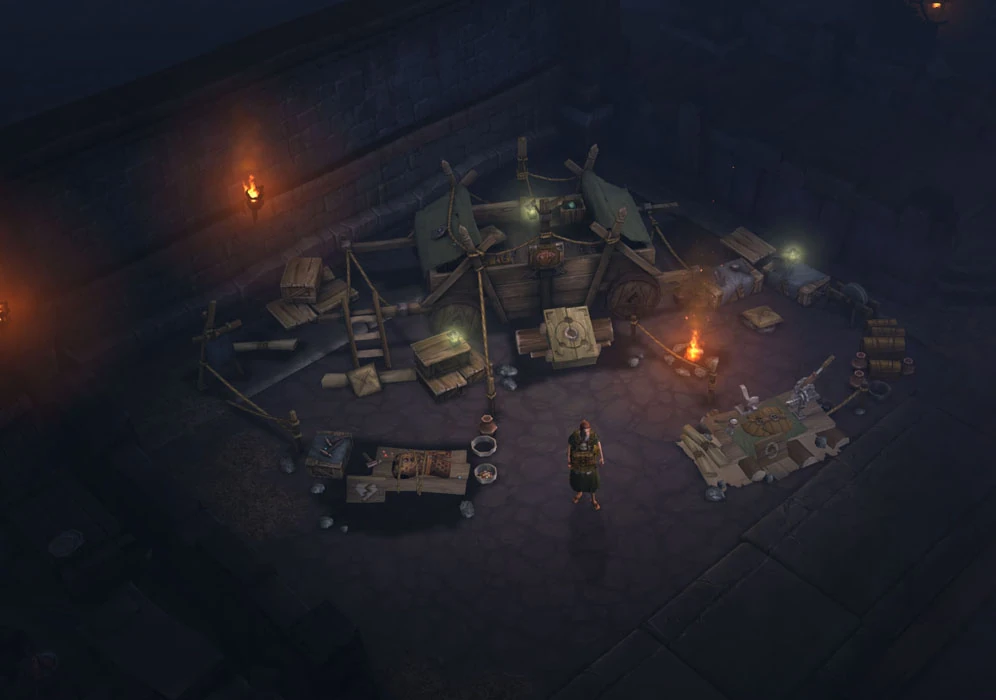
The Blacksmith and crafts weapons and armor of all kinds for the player to use, ranging from wands to Archon Plate, from magic to rare items.
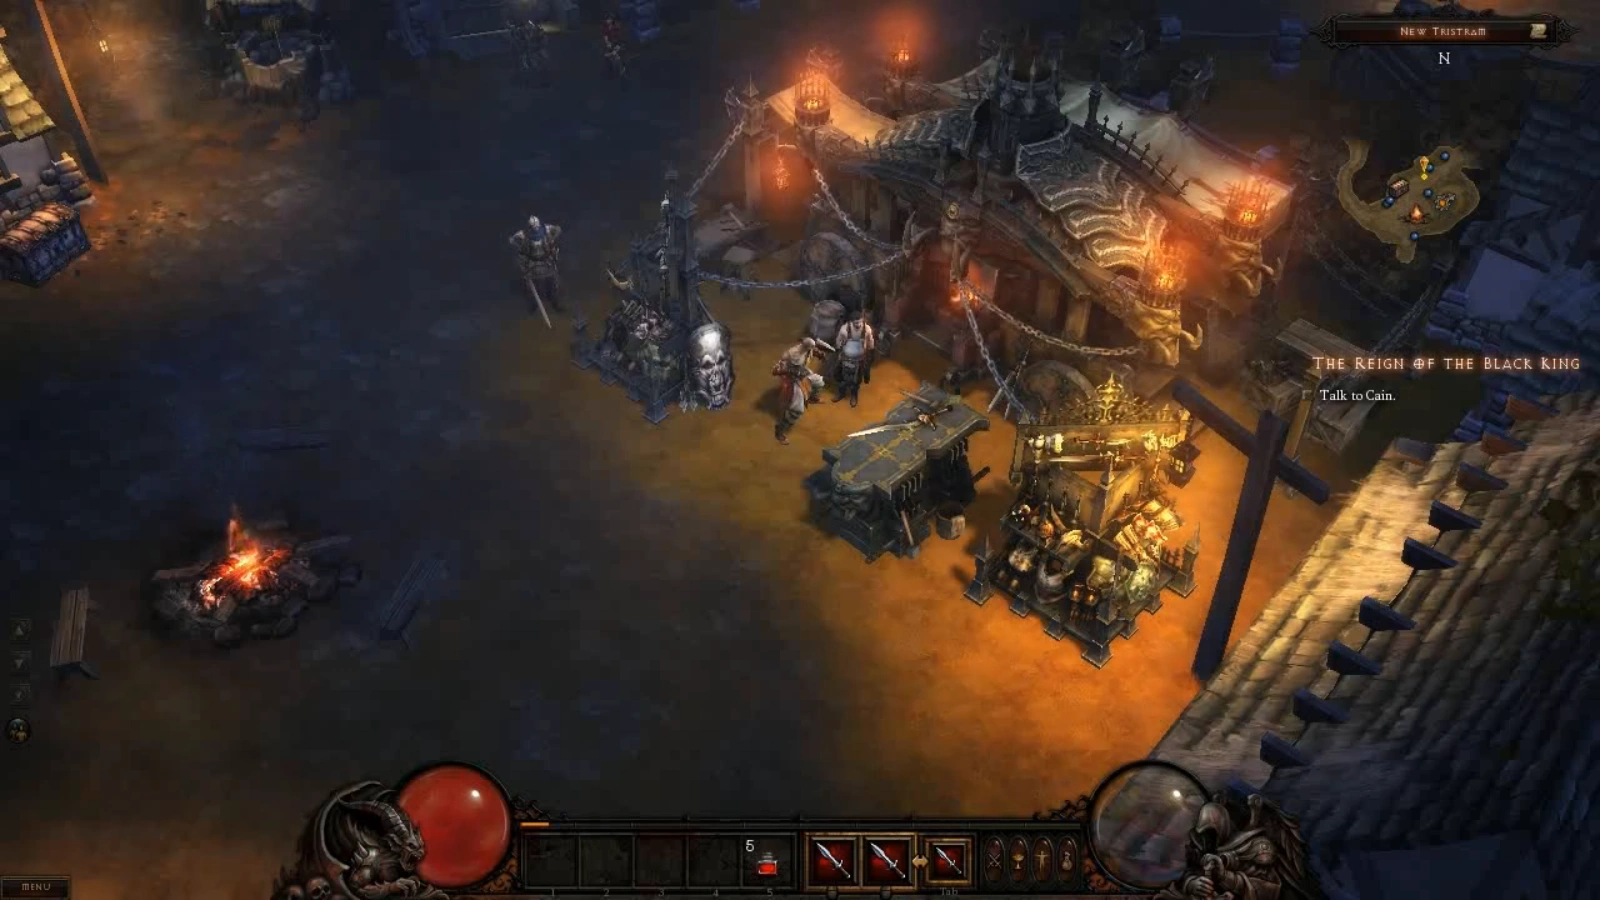
He is the encountered first of two encountered Artisans. He can be found during the A Shattered Crown quest in Act I.
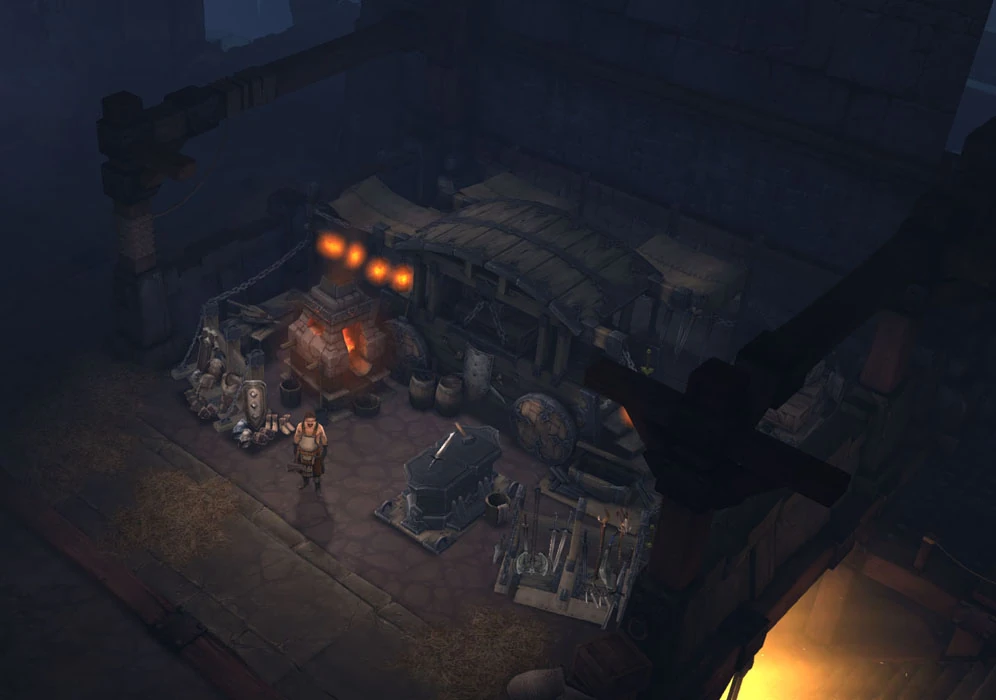
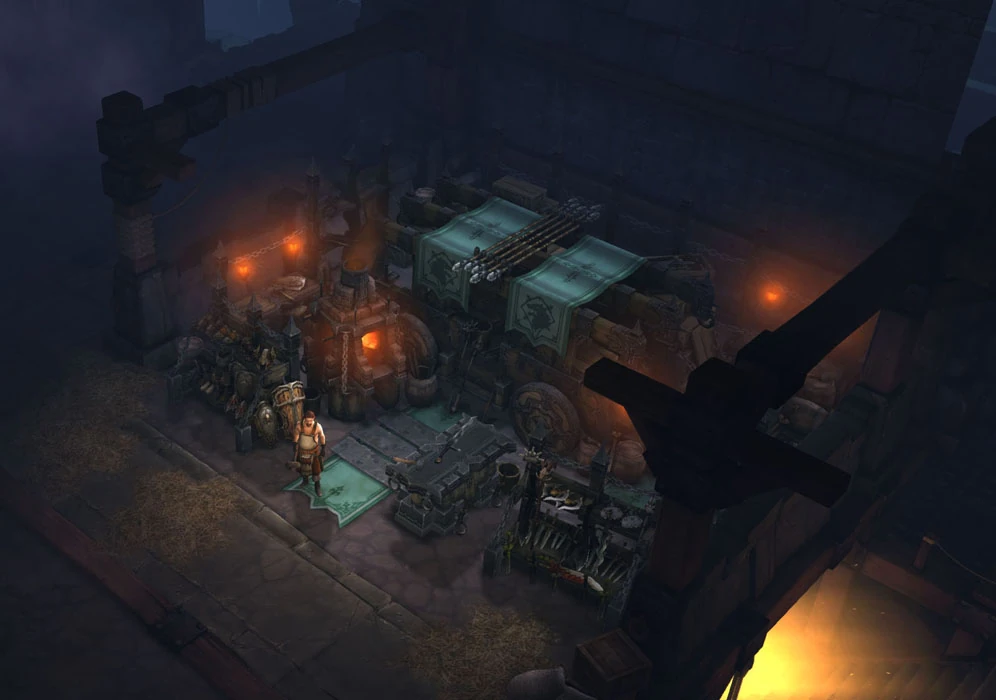
The Blacksmith's wagon features a rough, sharp aesthetic made up of wood and metal that evolves as you level him up.
Services
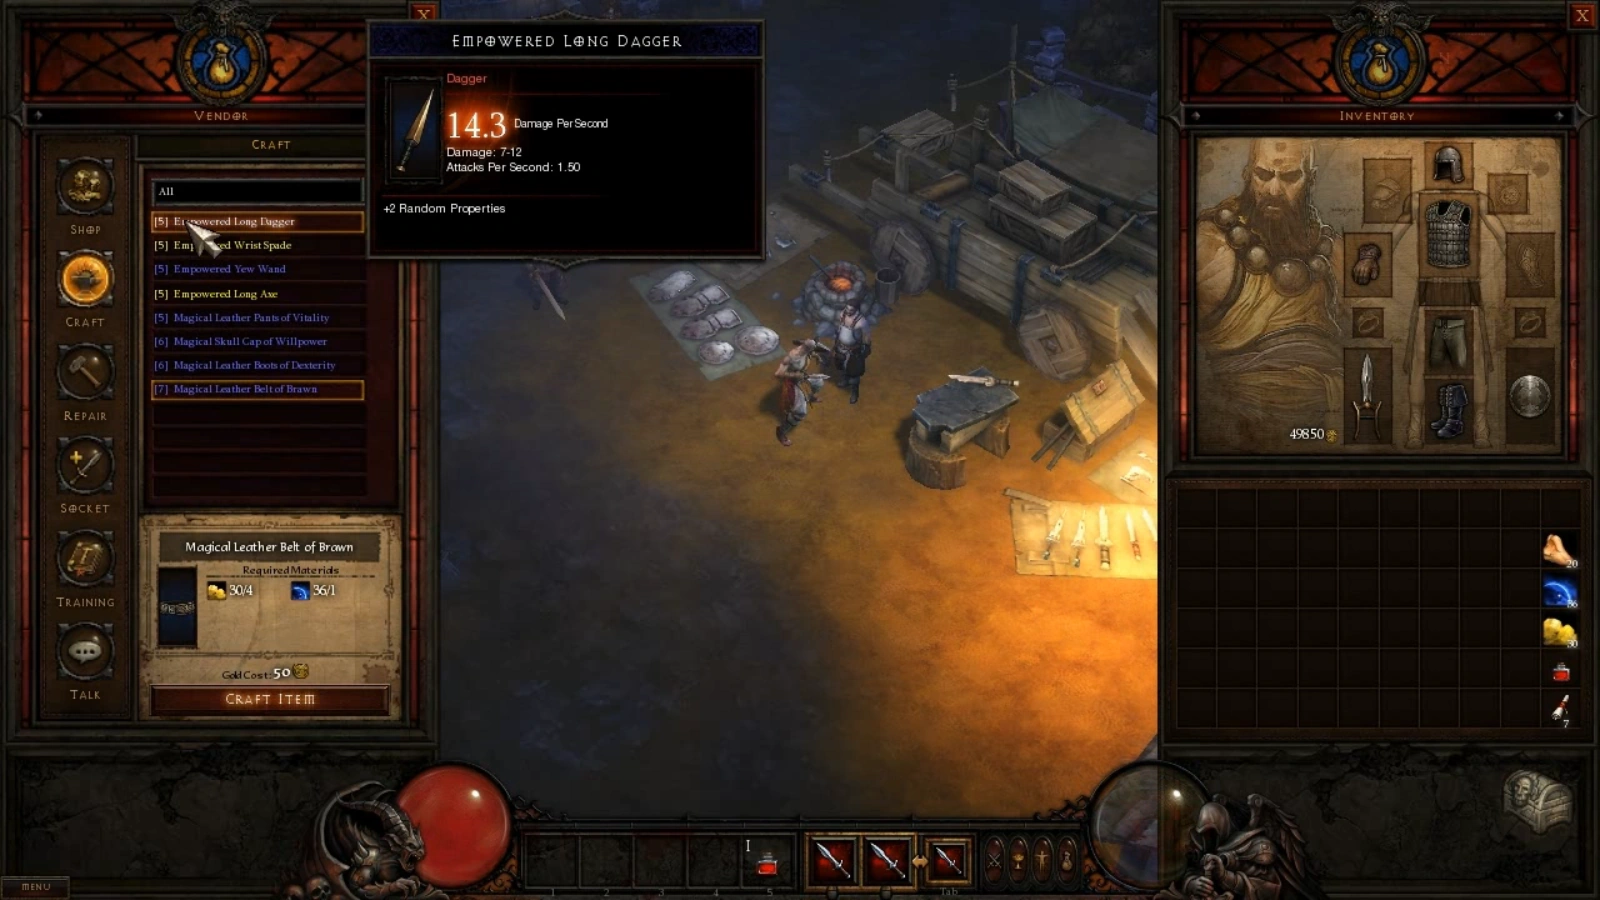
- Forge Items: The Blacksmith can make weapons and armor from salvagable material. As the blacksmith levels up and is taught recipes he can make higher level gear and higher quality gear, such as rare items with six modifiers rather than four.
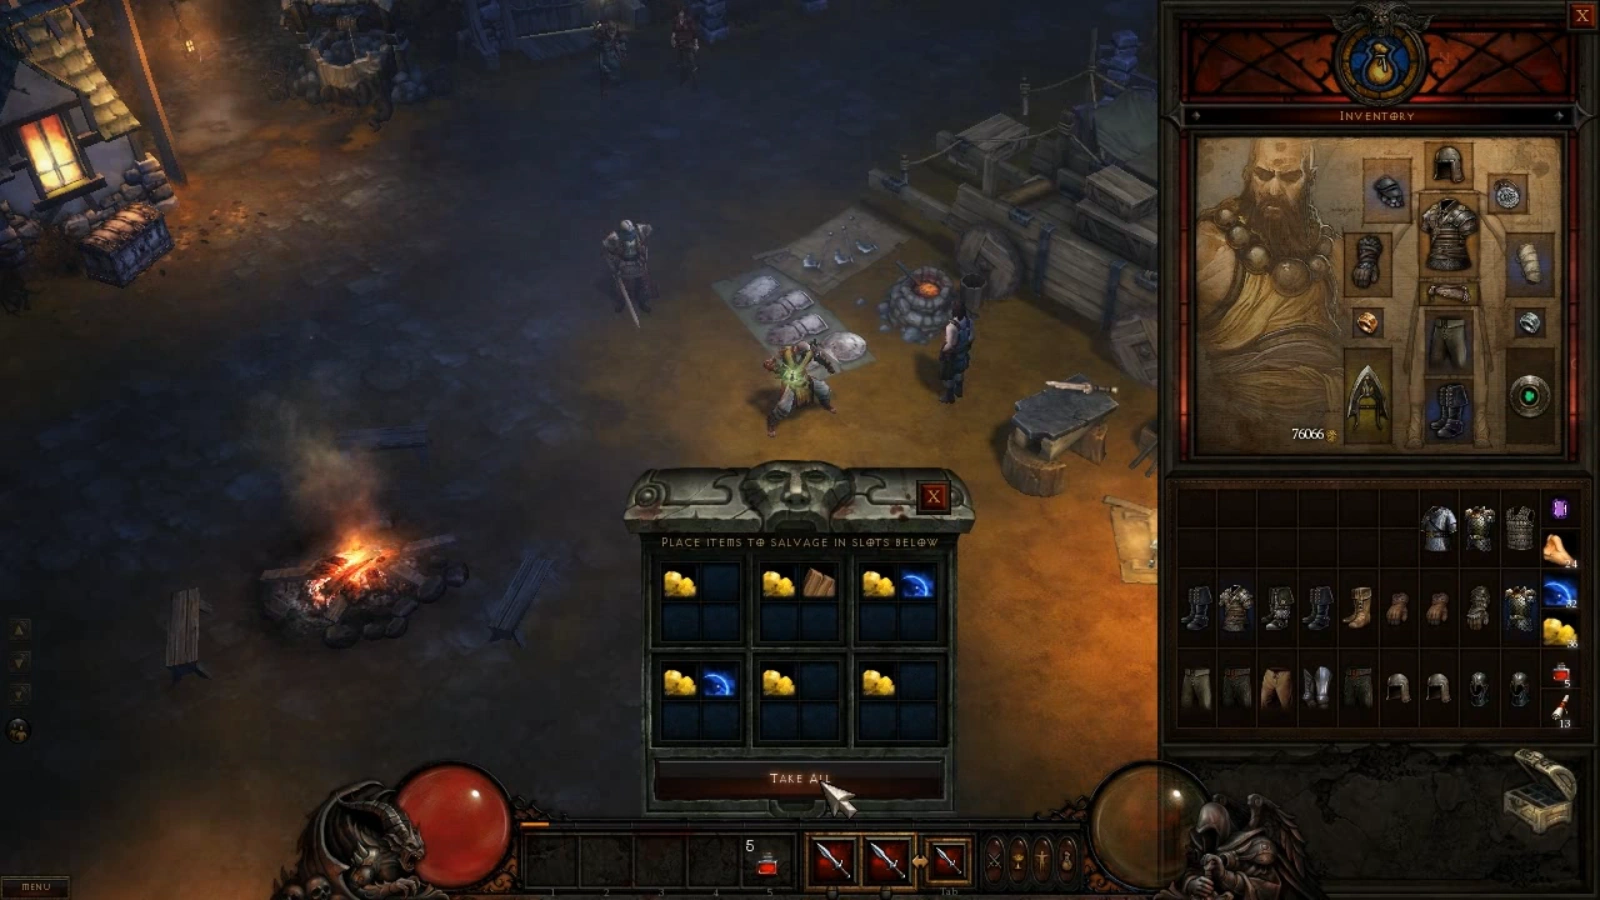
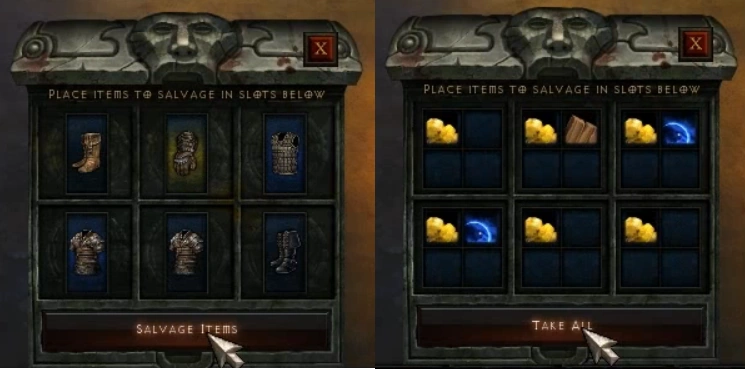
- Salvage items: The Blacksmith can salvage magic, rare, set and legendary items. The result of salvaging depends on the item rarity. There is however a chance to receive a crafting material of higher rarity, than the salvaged item. For more, see Crafting Materials.
Before the Beta the blacksmith could also socket items, but this service has since been moved to the Jeweler.
As of Beta patch 13, the blacksmith no longer offers repairs. Instead, they are available at the vendor.
Forging
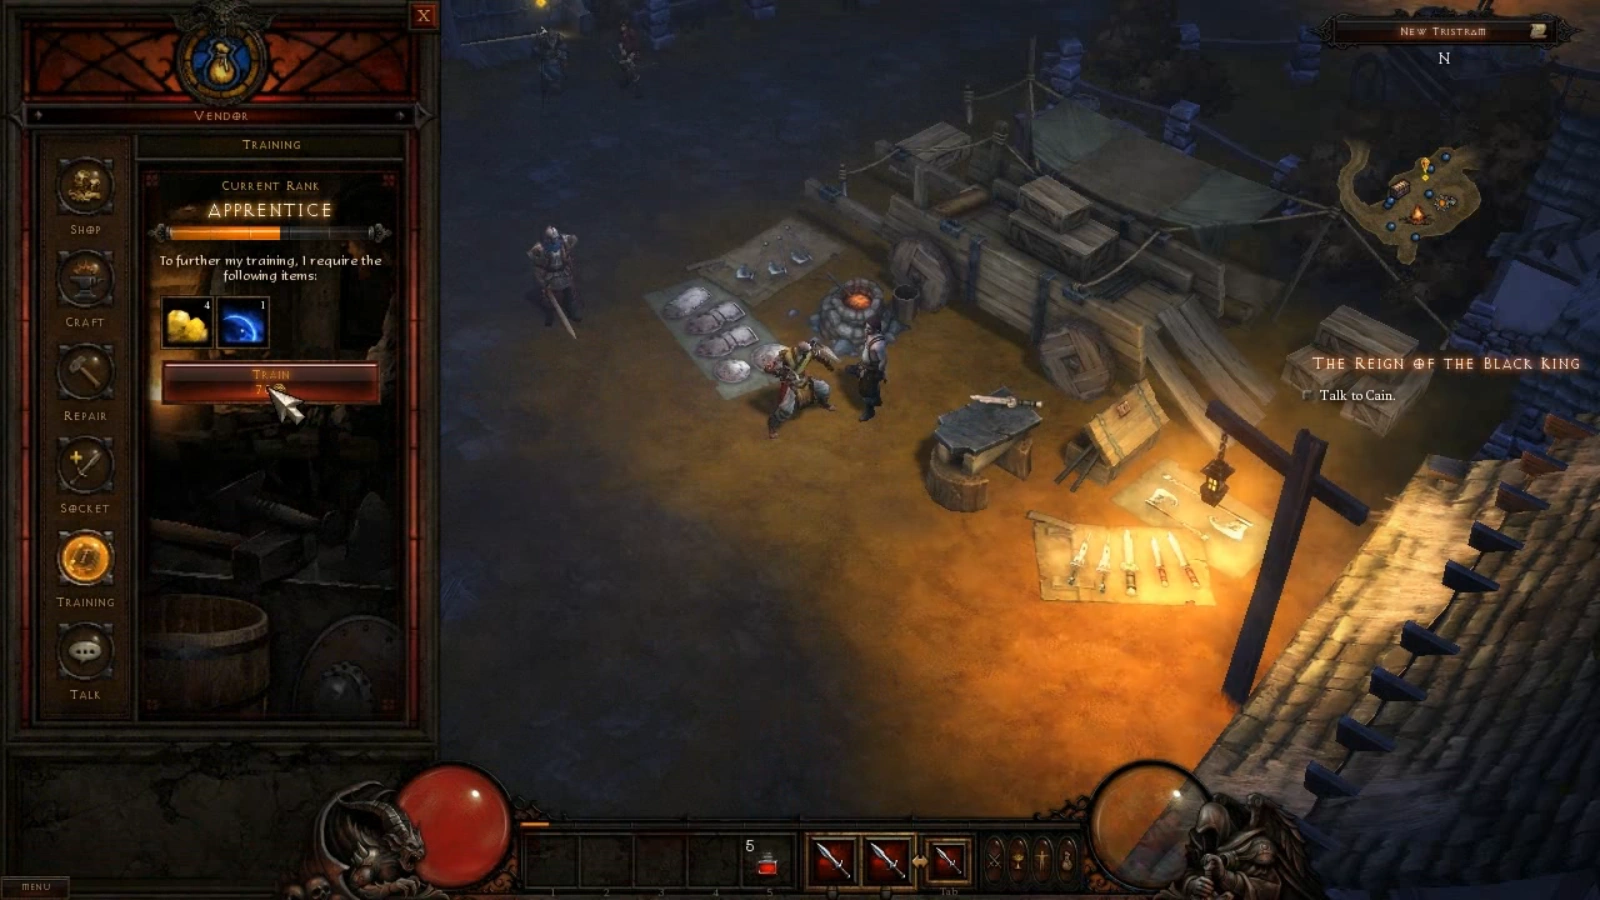
As the player trains the blacksmith, he gains access to a wider range of items. In order to level up the Blacksmith it is required to train him 5 times at each level. Each level up automatically grants him several new recipes, as well as a few more each time he is trained, even if he does not gain a level. Additionally the Blacksmith can be taught new recipes by giving him Plans, which can drop in the wild. As he levels up he will be able to learn more and more of them, since each Plan has a minimum Artisan level to learn.
Rare items start to appear on Journeyman level.
Each time he reaches a new difficulty level (levels 5, 7 and 9) he also gains the ability to upgrade crafting materials from earlier difficulties in addition to new equipment crafts.
Recipes
Upgrade Costs
Apart from gold, the Blacksmith requires 1 Death's Breath to advance past level 10. (Requires Reaper of Souls). Also required by the Jeweler to train past level 10.
| Level | Title | Gold | Pages of Training | Level |
|---|---|---|---|---|
| 1 | Apprentice | - | - | 1-15 |
| 2 | Journeyman | 5,000 |
- | 15-20 |
| 3 | Adept | 6,000 |
- | 20-25 |
| 4 | Master | 10,000 |
- | 25-30 |
| 5 | Grandmaster | 15,000 |
- | 30-35 |
| 6 | Illustrious | 20,000 |
- | 30-40 |
| 7 | Magnificent | 25,000 |
- | 40-45 |
| 8 | Resplendent | 30,000 |
- | 45-50 |
| 9 | Glorious | 35,000 |
- | 50-55 |
| 10 | Exalted | 40,000 |
- | 55-60 |
| 11 | Exquisite | 50,000 |
1 |
60-65 |
| 12 | Sovereign | 75,000 |
- | 65-70 |
| Total | 311,000 |
1 |
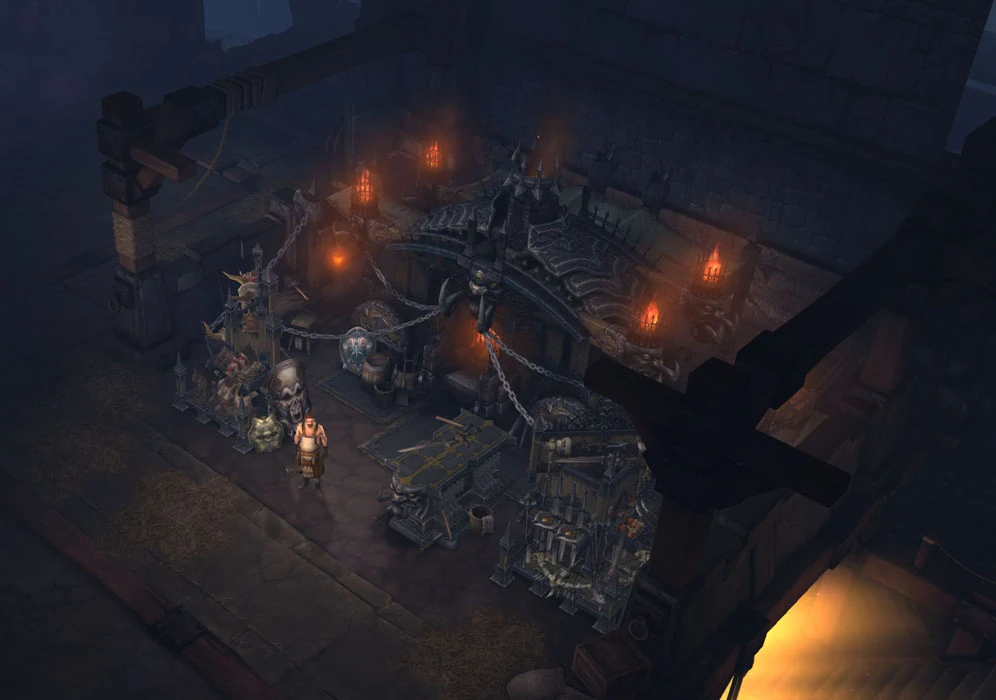
Gallery

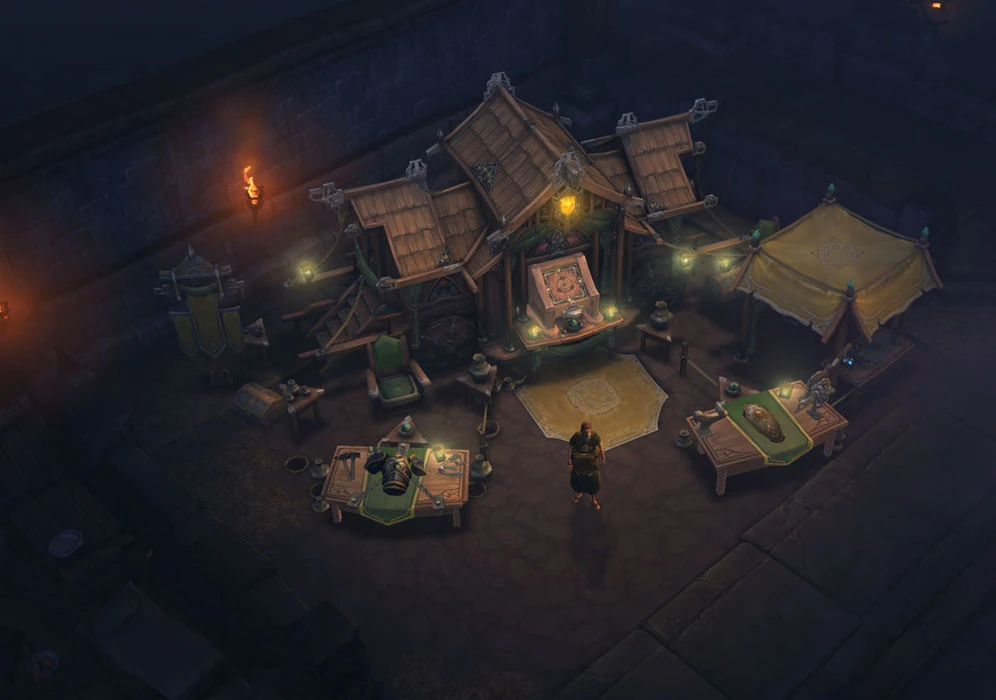
Normal Blacksmith Wagon

Nightmare Blacksmith Wagon

Hell Blacksmith Wagon

Inferno Blacksmith Wagon

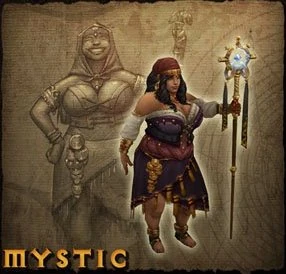
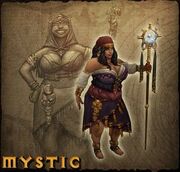
The Mystic Myriam Jahzia
- This article is about the Mystic artisan. Were you looking for information about the Mystic NPC Myriam Jahzia?
The Mystic focuses on enhancing the players gear with bonuses to attributes, damage, gold find, resource regeneration and much more. The Mystic was removed from the game during development.[1]
Services
- Enchanting: The Mystic is able to Enchant the player's armor, weapons, and jewelry to add to a player's attributes, deal additional damage types, or increase magical resistances. The Mystic can learn higher levels of enchantments if provided with Mystic Forumulas.
Before release, the mystic was originally planned to sell crafted items that will be used by the caster classes, such as staves and wands, as well as create scrolls, Runestones, charms, and potions.
Enchanting
Like the Blacksmith, but unlike the Jeweler, the Mystic levels up in incremental steps: in order to reach the next level she must be trained five times at each level. Each such incremental training gives her access to more enhancments. These enhancments can be applied to:
Legs can also be socketed by the Jeweler, while amulets and bracers can neither be socketed nor enchanted.
Upgrade Cost
| Level | Title | Gold | Tomes | Material | Difficulty |
|---|---|---|---|---|---|
| 1 | Apprentice | - | - | - | Normal |
| 2 | Journeyman | 650 |
5 |
30 |
Normal |
| 3 | Adept | 1500 |
5 |
30 |
Normal |
| 4 | Master | 2750 |
5 |
20 10 |
Nightmare |
| 5 | Grandmaster | 3000 |
5 |
30 |
Nightmare |
| 6 | Illustrious | 5500 |
10 |
30 |
Nightmare |
| 7 | Magnificent | 8000 |
10 |
20 10 |
Hell |
| 8 | Resplendent | 10500 |
25 |
30 |
Hell |
| 9 | Glorious | 13000 |
25 |
20 10 |
Inferno |
| 10 | Exalted | 18000 |
50 |
70 |
Inferno |
| Total | 63,900 |
140 |
80 90 60 80 |
The Mystic requires 30 fewer Common Scraps and 30 more Assorted Fragments to fully upgrade compared to the Blacksmith, but has otherwise identical costs.
Mystic Formulas
Enhance 1H Weapons | ||
|---|---|---|
| Name | Description | |
| Blight | Teaches the Mystic how to enhance a 1H Weapon to deal Poison Damage to monsters. | |
| Brutality | Teaches the Mystic how to enhance a 1H Weapon with Critical Damage, increasing damage to monsters when landing Critical Hits. | |
| Devouring | Teaches a Mystic how to enhance a 1H Weapon to drain a major amount of life with all damage dealt. | |
| Minor Devouring | Teaches a Mystic how to enhance a 1H Weapon to drain a minor amount of life with all damage dealt. | |
| Minor Frost | Teaches the Mystic how to enhance a 1H Weapon to deal minor Cold Damage to monsters. | |
| Minor Gore | Teaches a Mystic how to enhance a 1H Weapon with a minor increase to its Minimum and Maximum damage. | |
| Major Blight | Teaches the Mystic how to enhance a 1H Weapon to deal major Poison Damage to monsters. | |
| Major Cosmos | Teaches the Mystic how to enhance a 1H Weapon to deal major Arcane Damage to monsters. | |
| Major Frost | Teaches the Mystic how to enhance a 1H Weapon to deal major Cold Damage to monsters. | |
| Superior Blight | Teaches the Mystic how to enhance a 1H Weapon to deal superior Poison Damage to monsters. | |
| Superior Brutality | Teaches the Mystic how to enhance a 1H Weapon with superior Critical Damage, increasing damage to monsters when landing Critical Hits. | |
| Superior Celerity | Teaches a Mystic how to enhance a 1H Weapon with a superior Haste increase. | |
| Superior Cosmos | Teaches the Mystic how to enhance a 1H Weapon to deal superior Arcane Damage to monsters. | |
| Superior Devouring | Teaches a Mystic how to enhance a 1H Weapon to drain a superior amount of life with all damage dealt. | |
| Superior Frost | Teaches the Mystic how to enhance a 1H Weapon to deal superior Cold Damage to monsters. | |
| Superior Scorching | Teaches the Mystic how to enhance a 1H Weapon to deal superior Fire Damage to monsters. | |
Enhance 2H Weapons | ||
| Name | Description | |
| Brutality | Teaches the Mystic how to enhance a 2H Weapon with Critical Damage, increasing damage to monsters when landing Critical Hits. | |
| Cosmos | Teaches the Mystic how to enhance a 2H Weapon to deal Arcane Damage to monsters. | |
| Minor Celerity | Teaches a Mystic how to enhance a 1H Weapon with a minor Haste increase. | |
| Minor Frost | Teaches the Mystic how to enhance a 2H Weapon to deal minor Cold Damage to monsters. | |
| Minor Gore | Teaches a Mystic how to enhance a 2H Weapon with a minor increase to its Minimum and Maximum damage. | |
| Minor Scorching | Teaches the Mystic how to enhance a 2H Weapon to deal minor Fire Damage to monsters. | |
| Major Celerity | Teaches a Mystic how to enhance a 2H Weapon with a major Haste increase. | |
| Major Cosmos | Teaches the Mystic how to enhance a 2H Weapon to deal major Arcane Damage to monsters. | |
| Superior Blight | Teaches the Mystic how to enhance a 2H Weapon to deal superior Poison Damage to monsters. | |
| Superior Brutality | Teaches the Mystic how to enhance a 2H Weapon with superior Critical Damage, increasing damage to monsters when landing Critical Hits. | |
| Superior Cosmos | Teaches the Mystic how to enhance a 2H Weapon to deal superior Arcane Damage to monsters. | |
| Superior Devouring | Teaches a Mystic how to enhance a 2H Weapon to drain a superior amount of life with all damage dealt. | |
| Superior Devouring | Teaches a Mystic how to enhance a 2H Weapon to drain a superior amount of life with all damage dealt. | |
| Superior Frost | Teaches the Mystic how to enhance a 2H Weapon to deal superior Cold Damage to monsters. | |
| Superior Gore | Teaches a Mystic how to enhance a 2H Weapon with a superior increase to its Minimum and Maximum damage. | |
| Superior Scorching | Teaches the Mystic how to enhance a 2H Weapon to deal superior Fire Damage to monsters. | |
Enhance Ranged Weapons | ||
| Name | Description | |
| Devouring | Teaches a Mystic how to enhance a Ranged Weapon to drain a life with all damage dealt. | |
| Frost | Teaches the Mystic how to enhance a Ranged Weapon to deal Cold Damage to monsters. | |
| Scorching | Teaches the Mystic how to enhance a Ranged Weapon to deal Fire Damage to monsters. | |
| Minor Celerity | Teaches a Mystic how to enhance a Ranged Weapon with a minor Haste increase. | |
| Minor Scorching | Teaches the Mystic how to enhance a Ranged Weapon to deal minor Fire Damage to monsters. | |
| Major Cosmos | Teaches the Mystic how to enhance a Ranged Weapon to deal major Arcane Damage to monsters. | |
| Major Frost | Teaches the Mystic how to enhance a Ranged Weapon to deal major Cold Damage to monsters. | |
| Major Scorching | Teaches the Mystic how to enhance a Ranged Weapon to deal major Fire Damage to monsters. | |
| Superior Blight | Teaches the Mystic how to enhance a Ranged Weapon to deal superior Poison Damage to monsters. | |
| Superior Brutality | Teaches the Mystic how to enhance a Ranged Weapon with superior Critical Damage, increasing damage to monsters when landing Critical Hits. | |
| Superior Celerity | Teaches a Mystic how to enhance a Ranged Weapon with a superior Haste increase. | |
| Superior Cosmos | Teaches the Mystic how to enhance a Ranged Weapon to deal superior Arcane Damage to monsters. | |
| Superior Devouring | Teaches a Mystic how to enhance a Ranged Weapon to drain a superior amount of life with all damage dealt. | |
| Superior Frost | Teaches the Mystic how to enhance a Ranged Weapon to deal superior Cold Damage to monsters. | |
| Superior Scorching | Teaches the Mystic how to enhance a Ranged Weapon to deal superior Fire Damage to monsters. | |
Enhance Wands | ||
| Name | Description | |
| Celerity | Teaches a Mystic how to enhance a Wand with a Haste increase. | |
| Cosmos | Teaches the Mystic how to enhance a Wand to deal Arcane Damage to monsters. | |
| Frost | Teaches the Mystic how to enhance a Wand to deal Cold Damage to monsters. | |
| Minor Blight | Teaches the Mystic how to enhance a Wand to deal minor Poison Damage to monsters. | |
| Minor Devouring | Teaches a Mystic how to enhance a Wand to drain a minor amount of life with all damage dealt. | |
| Major Celerity | Teaches a Mystic how to enhance a Wand with a major Haste increase. | |
| Major Scorching | Teaches the Mystic how to enhance a Wand to deal major Fire Damage to monsters. | |
| Superior Blight | Teaches the Mystic how to enhance a Wand to deal superior Poison Damage to monsters. | |
| Superior Brutality | Teaches the Mystic how to enhance a Wand with superior Critical Damage, increasing damage to monsters when landing Critical Hits. | |
| Superior Cosmos | Teaches the Mystic how to enhance a Wand to deal superior Arcane Damage to monsters. | |
| Superior Devouring | Teaches a Mystic how to enhance a Wand to drain a superior amount of life with all damage dealt. | |
| Superior Frost | Teaches the Mystic how to enhance a Wand to deal superior Cold Damage to monsters. | |
| Superior Gore | Teaches a Mystic how to enhance a Wand with a superior increase to its Minimum and Maximum damage. | |
| Superior Scorching | Teaches the Mystic how to enhance a Wand to deal superior Fire Damage to monsters. | |
Enhance Boots | ||
| Name | Description | |
| Evasion | Teaches the Mystic how to enhance Boots with a Defense attribute increase. | |
| Fortification | Teaches the Mystic how to enhance Boots with an Armor increase. | |
| Minor Assault | Teaches the Mystic how to enhance Boots with a minor Attack attribute increase. | |
| Minor Fortification | Teaches the Mystic how to enhance Boots with a minor Armor increase. | |
| Major Accuracy | Teaches the Mystic how to enhance Boots with a major Precision attribute increase. | |
| Major Evasion | Teaches the Mystic how to enhance Boots with a major Defense attribute increase. | |
| Superior Accuracy | Teaches the Mystic how to enhance Boots with a superior Precision attribute increase. | |
| Superior Brawn | Teaches the Mystic how to enhance Boots with a superior Vitality attribute increase. | |
| Superior Evasion | Teaches the Mystic how to enhance Boots with a superior Defense attribute increase. | |
| Superior Fortification | Teaches the Mystic how to enhance Boots with a superior Armor increase. | |
| Superior Regeneration | Teaches the Mystic how to enhance Boots with a superior Life Regeneration increase. | |
Enhance Gloves | ||
| Name | Description | |
| Evasion | Teaches the Mystic how to enhance Gloves with a Defense attribute increase. | |
| Minor Assault | Teaches the Mystic how to enhance Gloves with a minor Attack attribute increase. | |
| Minor Fortification | Teaches the Mystic how to enhance Gloves with a minor Armor increase. | |
| Major Accuracy | Teaches the Mystic how to enhance Gloves with a major Precision attribute increase. | |
| Major Regeneration | Teaches the Mystic how to enhance Gloves with a major Life Regeneration increase. | |
| Superior Accuracy | Teaches the Mystic how to enhance Gloves with a superior Precision attribute increase. | |
| Superior Assault | Teaches the Mystic how to enhance Gloves with a superior Attack attribute increase. | |
| Superior Evasion | Teaches the Mystic how to enhance Gloves with a superior Defense attribute increase. | |
| Superior Fortification | Teaches the Mystic how to enhance Gloves with a superior Armor increase. | |
| Superior Regeneration | Teaches the Mystic how to enhance Gloves with a superior Life Regeneration increase. | |
Enhance Pants | ||
| Name | Description | |
| Evasion | Teaches the Mystic how to enhance Pants with a Defense attribute increase. | |
| Fortification | Teaches the Mystic how to enhance Pants with an Armor increase. | |
| Minor Brawn | Teaches the Mystic how to enhance Pants with a Vitality attribute increase. | |
| Minor Regeneration | Teaches the Mystic how to enhance Pants with a minor Life Regeneration increase. | |
| Major Brawn | Teaches the Mystic how to enhance Pants with a major Vitality attribute increase. | |
| Major Evasion | Teaches the Mystic how to enhance Pants with a major Defense attribute increase. | |
| Superior Accuracy | Teaches the Mystic how to enhance Pants with a superior Precision attribute increase. | |
| Superior Assault | Teaches the Mystic how to enhance Pants with a superior Attack attribute increase. | |
| Superior Brawn | Teaches the Mystic how to enhance Pants with a superior Vitality attribute increase. | |
| Superior Evasion | Teaches the Mystic how to enhance Pants with a superior Defense attribute increase. | |
| Superior Fortification | Teaches the Mystic how to enhance Pants with a superior Armor increase. | |
| Superior Regeneration | Teaches the Mystic how to enhance Pants with a superior Life Regeneration increase. | |
Enhance Shoulders | ||
| Name | Description | |
| Brawn | Teaches the Mystic how to enhance Shoulders with a Vitality attribute increase. | |
| Minor Evasion | Teaches the Mystic how to enhance Shoulders with a minor Defense attribute increase. | |
| Major Fortification | Teaches the Mystic how to enhance Shoulders with a major Armor increase. | |
| Major Regeneration | Teaches the Mystic how to enhance Shoulders with a major Life Regeneration increase. | |
| Superior Accuracy | Teaches the Mystic how to enhance Shoulders with a superior Precision attribute increase. | |
| Superior Assault | Teaches the Mystic how to enhance Shoulders with a superior Attack attribute increase. | |
| Superior Brawn | Teaches the Mystic how to enhance Shoulders with a superior Vitality attribute increase. | |
| Superior Evasion | Teaches the Mystic how to enhance Shoulders with a superior Defense attribute increase. | |
| Superior Fortification | Teaches the Mystic how to enhance Shoulders with a superior Armor increase. | |
| Superior Regeneration | Teaches the Mystic how to enhance Shoulders with a superior Life Regeneration increase. | |
Enhance Rings | ||
| Name | Description | |
| Charred | Teaches a Mystic how to enhance a Ring with an increase to your Fire Resistance rating. | |
| Emerald | Teaches a Mystic how to enhance a Ring with an increase to your Poison Resistance rating. | |
| Euphoria | Teaches a Mystic how to enhance a Ring with an increase to the healing you receive from collecting Health Globes. | |
| Gathering | Teaches a Mystic how to enhance a Ring with an increase to your Gold and Health Globe Pickup Radius. | |
| Insulated | Teaches a Mystic how to enhance a Ring with an increase to your Lightning Resistance rating. | |
| Nomadic | Teaches a Mystic how to enhance a Ring with an increase to your Cold Resistance rating. | |
| Warding | Teaches a Mystic how to enhance a Ring with an increase to your Arcane Resistance rating. | |
| Minor Charred | Teaches a Mystic how to enhance a Ring with a minor increase to your Fire Resistance rating. | |
| Minor Emerald | Teaches a Mystic how to enhance a Ring with a minor increase to your Poison Resistance rating. | |
| Minor Insulated | Teaches a Mystic how to enhance a Ring with a minor increase to your Lightning Resistance rating. | |
| Minor Nomadic | Teaches a Mystic how to enhance a Ring with a minor increase to your Cold Resistance rating. | |
| Minor Warding | Teaches a Mystic how to enhance a Ring with a minor increase to your Arcane Resistance rating. | |
| Major Charred | Teaches a Mystic how to enhance a Ring with a major increase to your Fire Resistance rating. | |
| Major Emerald | Teaches a Mystic how to enhance a Ring with a major increase to your Poison Resistance rating. | |
| Major Insulated | Teaches a Mystic how to enhance a Ring with a major increase to your Lightning Resistance rating. | |
| Major Nomadic | Teaches a Mystic how to enhance a Ring with a major increase to your Cold Resistance rating. | |
| Major Warding | Teaches a Mystic how to enhance a Ring with a major increase to your Arcane Resistance rating. | |
| Superior Charred | Teaches a Mystic how to enhance a Ring with a superior increase to your Fire Resistance rating | |
| Superior Emerald | Teaches a Mystic how to enhance a Ring with a superior increase to your Poison Resistance rating. | |
| Superior Euphoria | Teaches a Mystic how to enhance a Ring with a superior increase to the healing you receive from collecting Health Globes. | |
| Superior Gathering | Teaches a Mystic how to enhance a Ring with a superior increase to your Gold and Health Globe Pickup Radius. | |
| Superior Insulated | Teaches a Mystic how to enhance a Ring with a superior increase to your Lightning Resistance rating. | |
| Superior Nomadic | Teaches a Mystic how to enhance a Ring with a superior increase to your Cold Resistance rating. | |
| Superior Warding | Teaches a Mystic how to enhance a Ring with a superior increase to your Arcane Resistance rating. | |
Gallery
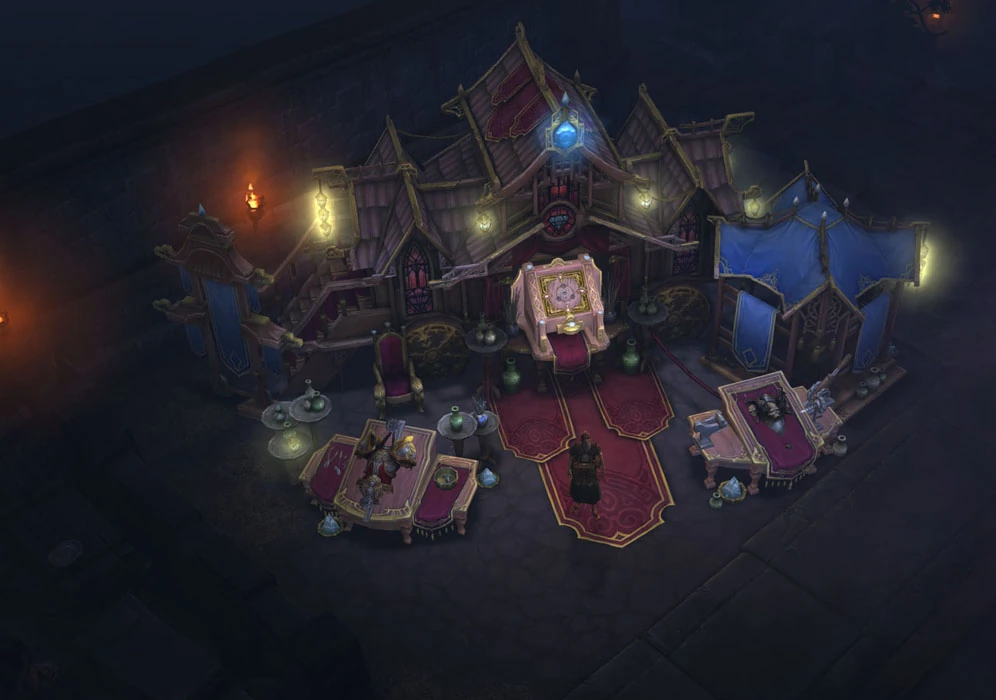
Normal Mystic Wagon
Nightmare Mystic Wagon
Hell Mystic Wagon
Inferno Mystic Wagon


References
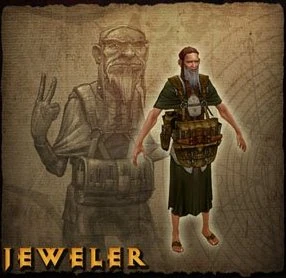

The Jeweler Covetous Shen
- This article is about the Jeweler artisan. Were you looking for information about the Jeweler NPC Covetous Shen?
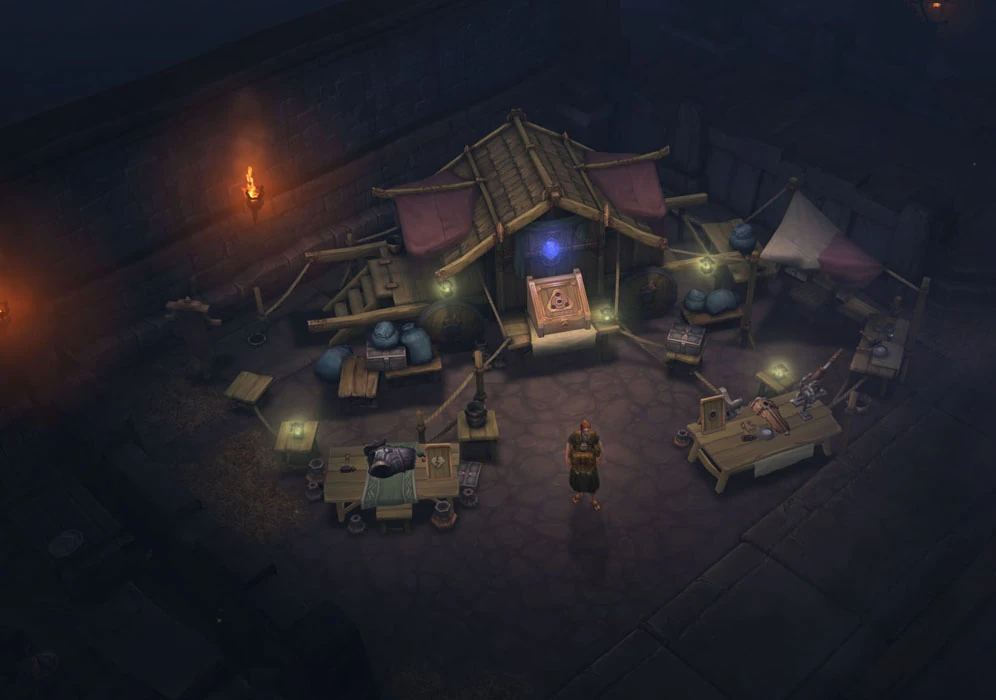
The Jeweler deals in precious jewelry; namely amulets, rings, and gems. The Jeweler will provide the player with special services involving gems. He is the second of the two encountered Artisans, and first offers his services during Act II, when sockets and gems first becomes available. The Jeweler's wagon boasts an especially ornate look, as his jewels are more difficult to display than the other Artisans' goods.
Services
- Combine Gems: Three gems of equal quality can be combined into one gem of a higher quality. There are 14 quality levels of gems in Diablo III, and only the lowest eight will be dropped from monsters. Therefore, it is up to the Jeweler to combine these gems to provide the player with the highest quality gems.
- Remove Gems: Should the player wish to remove gems already socketed into items, the Jeweler can do this without either destroying the item or the gem, allowing the player to not only reuse gems, but to upgrade the gems socketed in their items as well.
During development it was advertised that the jeweler would also be able to add sockets to item. This feature has since been removed, and as of patch 1.01 does not exist in the game.
Combine Gems
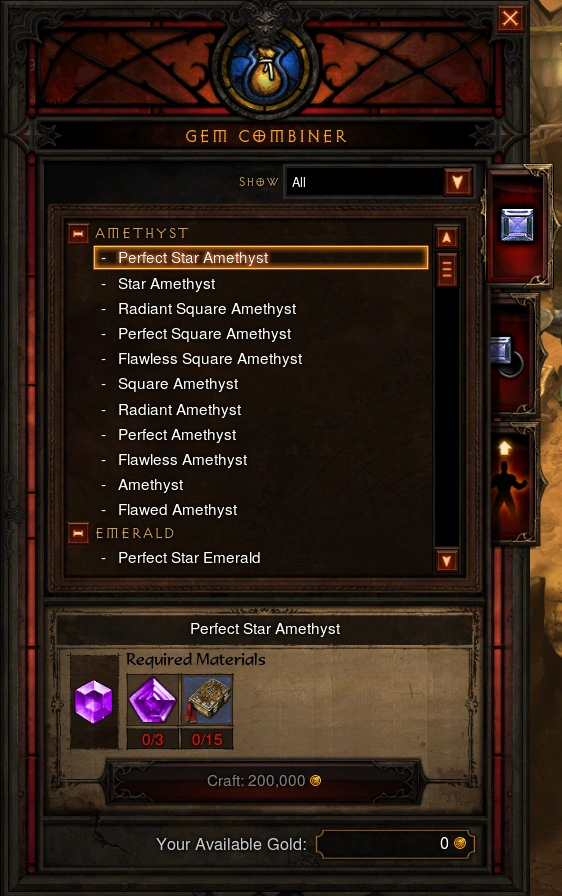
The only abilities affected by levelups are his gem upgrade services. At Apprentice level he starts out with only the ability to upgrade chipped gems to flawed level, and each subsequent upgrade allows him to upgrade gems one additional step. At Exalted level he gains the ability to create Star quality gems. In order to learn how to combine gems into Flawless Star, Perfect Star and Radiant Star quality, the Jeweler requires specific Designs.
In order to upgrade gems, it is required to provide the Jeweler with 3 gems of lesser quality, a small amount of gold and starting with tier 4 gems also specific Pages of Training.
The table below shows the exact costs of upgrading each gems along with the required Jeweler level and way of recipe acquisition.
Remove Gems
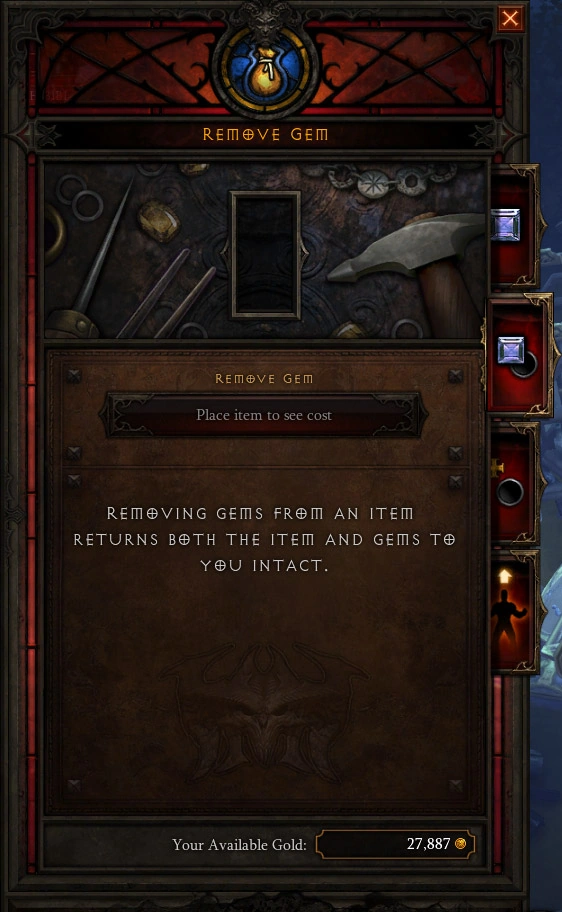
The gem removal service has been implemented in order to encourage the usage of lower level gems, while still having an aim of obtaining tier 14 gems. Thanks to the mechanic that allows to receive both the gem and the socketed item it is possible to use without any consequences of loss low tier gems from the start of the adventure.
The gem removal service also serves as a Gold Sink, since upon finding better equipment players might want to re-socket their gems from previously used gear or change the type of gems used depending on the player needs.
| Prefix | Tier | Cost |
|---|---|---|
| Chipped | 1 | 200 |
| Flawed | 2 | 302 |
| Normal | 3 | 420 |
| Flawless | 4 | 528 |
| Perfect | 5 | 648 |
| Radiant | 6 | 780 |
| Square | 7 | 1140 |
| Flawless Square | 8 | 1560 |
| Perfect Square | 9 | 2195 |
| Radiant Square | 10 | 2850 |
| Star | 11 | 3525 |
| Flawless Star | 12 | 4540 |
| Perfect Star | 13 | 5585 |
| Radiant Star | 14 | 6660 |
Upgrade Costs
Apart from gold, the Jeweler requires 1 Death's Breath to advance past level 10. (Requires Reaper of Souls). Also required by the Blacksmith to train past level 10.
| Level | Title | Gold | Pages of Training |
|---|---|---|---|
| 1 | Apprentice | - | |
| 2 | Journeyman | 1,000 |
- |
| 3 | Adept | 2,500 |
- |
| 4 | Master | 5,000 |
- |
| 5 | Grandmaster | 7,500 |
- |
| 6 | Illustrious | 10,000 |
- |
| 7 | Magnificent | 15,000 |
- |
| 8 | Resplendent | 20,000 |
- |
| 9 | Glorious | 25,000 |
- |
| 10 | Exalted | 30,000 |
- |
| 11 | Exquisite | 100,000 |
1 |
| 12 | Sovereign | 200,000 |
- |
| Total | 416,000 |
1 |
Gallery
Normal Jeweler Wagon
Nightmare Jeweler Wagon
Hell Jeweler Wagon
Inferno Jeweler Wagon
References
Leveling
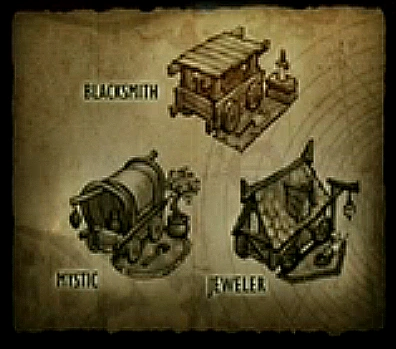

Concept art for the Artisans' wagons
As Artisans craft items and provide services, they will increase their skill, and eventually level up. As an Artisan increases in level, they will gain the ability to craft more items of increasing power. Their increased prowess will also be reflected by a visual change to the Artisan's shop. Eventually Artisans will be able to specialize in different areas, such as the Blacksmith specializing in Swordsmithing or Axesmithing. There's no need to choose which artisan to develop or focus on. Given enough time, all three can be developed fully. All three artisans will be optional to use; if the player doesn't want to craft, there's no need to. Crafting merely provides the player with another venue through which they can acquire items.
The level of the Artisan is retained across all characters. For example once an Artisan is unlocked on a second character, it will be the same level and have all the recipes that the player's first character obtained.[1]
Crafting Materials
The materials needed for crafting will be acquired primarily through salvaging. Items that the player finds but has no use for can be salvaged and converted into raw materials that can be provided to the Artisans for use in crafting. The crafting materials will take up much less space in the player's inventory than the items themselves, and will be stackable, thereby reducing the frequency that a player will need to return to town to clear out his inventory. Once an item has been salvaged, it will be destroyed and is not capable of being obtained again. Salvaging will be made possible by an artifact called the Nephalem Cube that players will come across while proceeding along the main storyline.[2]
The variety of crafting materials obtained through salvaging is currently unknown, though at least four could be seen in the crafting system trailer. In general, higher-quality items will provide you with more valuable and rarer salvage than lower-quality items -- but the rarest materials are always found in treasure chests or beside the corpses of your foes. It has been stated that lower quality materials will not be required for high level crafting. Therefore, in order to level your Artisans' skills, you will be required to progress your character into the higher difficulties of the game as well.
 |
 |
 |
| Common Scraps | Subtle Essence | Bone |
Recipes
There are two means by which Artisans will be able to learn new crafting recipes: leveling and drops. The higher a particular Artisan's skill is, the more recipes they will be able to provide. In addition to this, many of the best recipes in the game will be obtained as random world drops from monsters, which can then be taken to the Artisan to learn. Crafted items will feature a number of pre-set bonuses, but will also come with a variety of random bonuses when created. Lead game designer Jay Wilson has said that the crafting system is a sort of evolution and combination of several systems present in Diablo II, namely runewords and gambling.
See Recipes
Media
- Mats.png